Repairing cracked shower floor tiles using fillers
When it comes to repairing cracked shower floor tiles and shower grout, using fillers is an effective method. This process allows you to restore the integrity and appearance of your tile, giving you a functional and improved-looking shower once again, without having to worry about tile replacement. On this page, we’ll break down the steps involved in repairing cracked shower tiles using fillers and grout and why using a professional to fix cracked shower tiles might be a better solution.
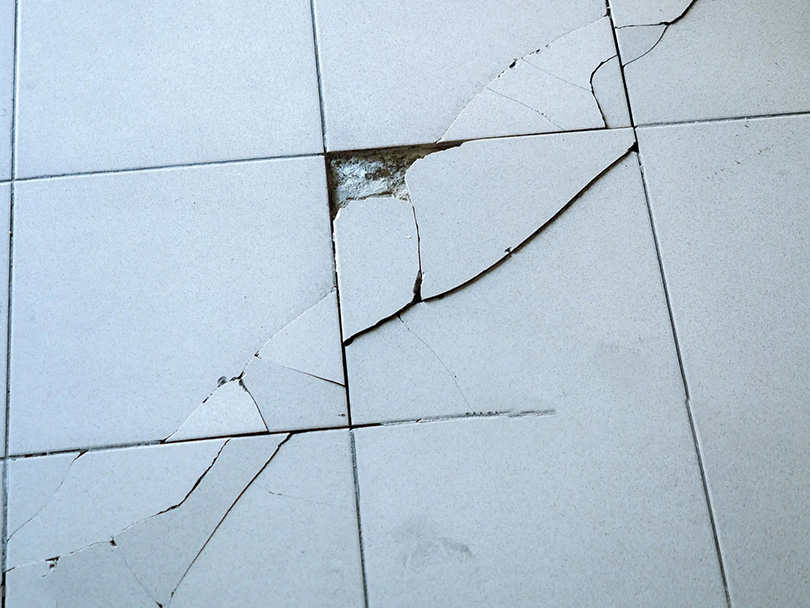
The process for fixing a cracked tile in the shower using filler
Start by examining the crack in your broken tile. Determine its size and depth, as this will impact the type of filler you’ll need. If the crack is a hairline crack, fairly small and superficial, you can opt for a non-shrinking, water-resistant tile filler. For larger or deeper cracks, or multiple tiles with cracks, you may choose to use an epoxy-based filler for added strength.
Clean the cracked area
Before applying any filler it’s crucial to thoroughly clean the crack and surrounding area of the damaged tile. Use a mild detergent and warm water to remove any dirt, grime, or soap residue. Rinse the area well and allow it to dry completely.
Prepare the cracked shower tiles filler
Follow the manufacturer’s instructions to prepare the tile filler or epoxy-based filler. This may involve mixing two components together to activate the material. Use a small mixing container or a disposable applicator, ensuring the mixture is well-blended and be sure to follow the safety instructions.
Using a putty knife or a similar tool, carefully apply the filler to the crack. Start by filling the crack from the bottom, gradually working your way up to the surface of the tile. Ensure that the entire crack is filled, but avoid overfilling to prevent excess material from spilling onto the surrounding tile.
Once the filler is applied, use the edge of the putty knife or a spatula to smooth and level the surface. This will help create a seamless finish and ensure the repaired area is flush with the rest of the tile surface.
Let the filler cure according to the manufacturer’s instructions. This may vary depending on the type of filler used. During this time, avoid stepping on or applying any weight to the repaired area to ensure proper bonding and drying.
Once the filler has fully cured, it’s time to apply grout. Choose a grout color that matches the rest of your shower tiles for a cohesive look. Follow the manufacturer’s instructions to mix the grout to the desired consistency.
Grout the Crack: Using a rubber grout float, push the grout into the crack, ensuring it fills the space completely. Remove excess grout from the tile surface by holding the float at a 45-degree angle and gently scraping off the excess. Wipe away any remaining grout haze with a damp sponge.
Final Cleaning: After the grout has dried for the recommended time, give the entire area a final cleaning with a dry cloth or sponge. This will remove any residual grout, leaving you with a clean and polished shower.
Get your cracked tiles and grout repaired
Remember, while repairing a crack in your shower floor tile can be a rewarding DIY project, it’s wise to seek professional help if you’re unsure or uncomfortable tackling the task yourself. There may be water damage beneath or behind the tiled area of the shower floors and walls that requires assessment and rectification.
While repair costs are involved, it’s a worthwhile investment that may prevent much higher repair bills in the future.
If you’re looking for professional, efficient shower repairs Brisbane with guaranteed workmanship, then give us a call. We have years of experience and many 5-star reviews.
We’ll conduct an initial assessment then let you know your treatment options.
Often, we’re able to repair your shower without removing any tiles, saving you a considerable amount of time and money.
Call us for your free initial quote today.